Dinosaur Experts

This afternoon each of the children picked a dinosaur or extinct reptile/sea animal that they would like to learn about.  The goal is for each child to become the class expert in their choice of creature.  Here is a list of the current research subjects:

AW: Seismosaurus (Diplodocus?)

LBK: Pterodactylus

MK: Ankylosaurus

MC: Tyrannosaurus Rex

RN: Tyrannosaurus Rex

RW: Dinichthys

SJ: Brachiosaurus

ZC: Velociraptor

Beginning a Mural

Our dinosaur research has begun!  Now that we are learning more about these amazing creatures, we are designing a place to showcase our knowledge.  Our new mural began with a discussion about environments and what we might see surrounding our dinosaurs.  The children decided that our picture should include a volcano, plants, trees, dirt, mud, water, and lava.  Painting began yesterday.

The paper we chose for this project is very large, so we had a difficult time finding room to paint on it.  We settled on a section of wall that we covered with drop cloth and scrap paper.  Painting the sky was a very large job, so we used traditional wall paint brushes to cover the area.  Today, two children were in charge of deciding where the brown paint should go.  They sketched in the volcano first and then painted it in.  Next, they chose to paint trunks for trees.  Finally, they added some “mud” along the bottom.


What do you want to learn today?

When we returned from winter break on Monday, we discussed what our next topic of study should be.  Surprisingly, there was really only one suggestion and it was agreed upon by all immediately: Colors.  This actually grew out of a discussion we had many weeks ago, yet the ever-amazing children recalled it quickly when I asked what they wanted to learn about.  Thus, this week we’ve been exploring colors.

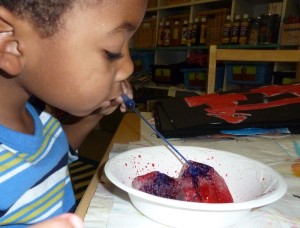
Our first experiment involved large chunks of ice that we found in the sleds outside.  Each child had their own piece.  The center of the table held a container of liquid watercolors in blue, red, and yellow, each with droppers for testing.

The children choose which colors they wanted to try and began dropping colors onto their ice.  Some of them chose to use the same color repeatedly, ending up with a solid color of ice.  Others mixed two colors and made loud exclamations when they realized that they had made a new color.  A few quickly used all of the colors and wanted to know why the water under their ice was “black”.

Our next project was creating a rainbow using tissue paper and watered down glue.  We used the three primary colors to create each of the colors we needed.   Although the test version of combining light blue, yellow, and red tissue paper made lovely versions of purple, orange, and green, our actual dry rainbow’s secondary colors are a bit hard to pick out.  However, the children were just as excited as they painted the glue on when the two wet pieces mixed and created a new color.

The most gooey of the projects this week was definitely our color equations. Following a discussion about primary colors, each child picked two primary colors which were then painted on their hands.  Each color was then printed on a large sheet.  Hands were rubbed together vigorously, followed by a third hand print.  Plus and equal signs were added later.  We completed this activity by sharing our findings and learning that these new colors are called secondary colors.

Castle Mural Part I

As part of our fairy tale study, we began constructing a large mural that includes a castle.  The main background was painted light blue by the students to represent the sky.  Next, we used texture rubbing plates to create a large variety of bumpy blackish-brownish papers.  After our discussion of symmetry and our block printing experience, I cut the texture papers into block shapes and the children designed our castle.  Each child picked two each of two shapes and placed them symmetrically on the castle.  They created towers, walls, overhangs, and turrets.

This activity was followed a day later with a discussion about how our project looked thus far.  We looked at it critically and tried to decide if it was missing anything.  It seems that it still needed windows, a gate or drawbridge, trees, towers, a moat, and lots of creatures.  The children decided we had a long way to go before we could call this project “done”.

Our next step was completed by my Thursday afternoon crew.  They each painted grey two paper towel tubes cut to resemble towers.  The children used double-sided wall mounting strips to place them on the castle.

Finishing up our background, the students remembered that the castle needed a moat.  It sort of looked like it was floating in the air without one.  We used torn tissue paper and watered-down glue to add a layer of “water” to the bottom of our mural.

Our next endeavor will be to populate our castle.  Who do you think belongs in our mural?  What else are we missing?

Sparkly Spiders

We’ve been spending a lot of time learning about spiders the past few weeks.  We learned that not all spiders make webs.  We found out that spiders have two body parts, a head and an abdomen, and that they always have eight legs.  We’ve classified some of the creepy crawlies we’ve found outside based on these rules and were surprised to find that some creatures we thought were spiders, really weren’t at all.

Creating a spider to demonstrate our new knowledge of arachnid anatomy was an obvious next step.  Each child decided how many legs to include and how to represent the main body parts.  With this in mind, the children were very focused on creating eight legs and distributing them evenly.  The glitter, however, was Mrs. Forst’s idea and obviously has no place in true spider body structure.  But who can pass up a chance to use sparkly glitter?

The Problem With Wings

Creating a Sign-in Board for Pilot Turns

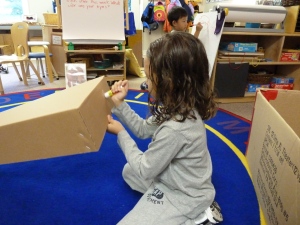
Our elevator has taken on a new identity.  Due to the excitement generated by some of the children over upcoming and past experiences on airplanes, our dramatic play center was transformed into an airport today.  The old elevator was flipped down onto its back and christened a plane.  So far, we have a steering wheel and a horn.  Some fabulous boxes are perfect for wings, but as of yet, we haven’t decided the best way to attach them.  Though I have an idea of my own, I’m letting the children try to come up with a workable plan for this massive undertaking.  So far this morning, we’ve tried glue sticks (it fell off), a suggestion of super glue (we don’t have any), and tape (it was placed sticky side down on the wing alone).  I’m looking forward to watching the direction this project will go.  Already, other children have noticed that the wing problem is a bit tough and are starting to offer suggestions.

Trying a Glue Stick