It’s the little things….

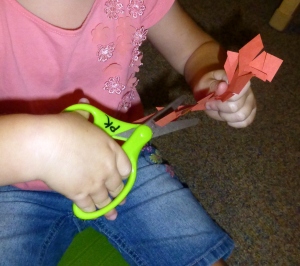
Keep Your Thumb UpWe covered lots of ground today.  Our conversations ranged from favorite colors to scissors to how to use glue.  Ask your children how to safely carry scissors when they are walking.  They might even remember the words to our cutting song (sung to the tune of London Bridges);

Keep your thumb up when you cut,

When you cut,

When you cut.

Keep your thumb up when you cut,

Cut with scissors.

As we slowly introduce each of the tools available in Pre-K, the children become comfortable with procedures for use and clean up.  Thank you for your patience as the first six weeks of school seem to be centered on the minutia of classroom routines.  Using techniques emphasized in Responsive Classroom all of the teachers at Winchester Thurston recognize the importance of beginning the year with strong, visible expectations that can be modeled and practiced.  The up-front investment in time creates a more smoothly running classroom as we dive more thoroughly into projects and curriculum later.

Costumes R Us?

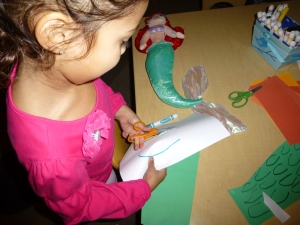
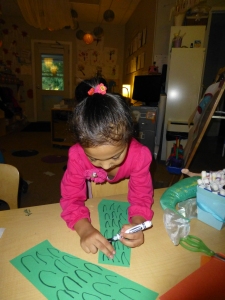
A few children thought our store really needed some costumes to sell. One of the girls decided that a mermaid costume would be the perfect thing.

"These are the legs. They are stuck together."
“These are the legs. They are stuck together.”


100813_0028
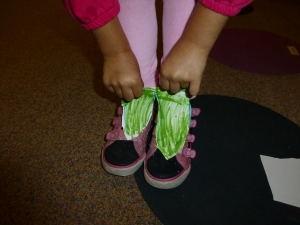
Now for the flippers. (Notice the mermaid model beside her for reference.)


100813_0036
Flippers!

Castle Mural Part I

As part of our fairy tale study, we began constructing a large mural that includes a castle.  The main background was painted light blue by the students to represent the sky.  Next, we used texture rubbing plates to create a large variety of bumpy blackish-brownish papers.  After our discussion of symmetry and our block printing experience, I cut the texture papers into block shapes and the children designed our castle.  Each child picked two each of two shapes and placed them symmetrically on the castle.  They created towers, walls, overhangs, and turrets.

This activity was followed a day later with a discussion about how our project looked thus far.  We looked at it critically and tried to decide if it was missing anything.  It seems that it still needed windows, a gate or drawbridge, trees, towers, a moat, and lots of creatures.  The children decided we had a long way to go before we could call this project “done”.

Our next step was completed by my Thursday afternoon crew.  They each painted grey two paper towel tubes cut to resemble towers.  The children used double-sided wall mounting strips to place them on the castle.

Finishing up our background, the students remembered that the castle needed a moat.  It sort of looked like it was floating in the air without one.  We used torn tissue paper and watered-down glue to add a layer of “water” to the bottom of our mural.

Our next endeavor will be to populate our castle.  Who do you think belongs in our mural?  What else are we missing?

Decorations

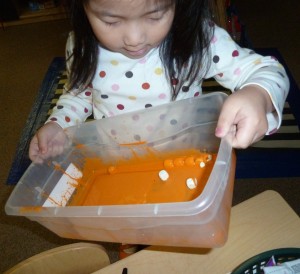
Our current math unit introduces and reinforces the concept of pattern creation and continuation.    Luckily, Halloween provides us many opportunities to practice and play with these ideas.  We were inspired while reading Six Creepy Sheep, by Judith Ross Enderle and Stephanie Gordon Tessler, and created some creepy decorations of our own.  In the picture on the left, one of the students is preparing wooden beads in an orange paint bath.  We also mixed up some lovely green, goblin beads.  When they dried, we drew faces on them to give them a bit of character.  Next, we strung them in an ABAB pattern on some skinny, wooden skewers.  To keep the beads from falling off, the students used  Model Magic to fashion a pumpkin and a round cap for each end of the stick.  (Note: If either end pops off, simply add a bit of white glue, stick it back together, and let it sit over night to dry.)  Finally, each child sorted through a large pile of wooden letter beads and found the blocks needed to make their own names.  These were strung on ribbon and laced through the pumpkins so that the project could be hung from a door handle. 

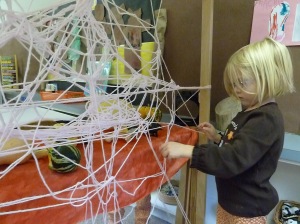
Much earlier in the week, the children became very excited over some cobwebs we found outside.  We decided that, for the upcoming holiday, a web would make a lovely addition inside our room, as well.  I prepared the weaving area by making a large X with an additional center line out of yarn on our play awning.  The children we then each given a turn with the roll of yarn and off they went!  I’m actually quite impressed with how it turned out.  They each took their time planning where they wished to place their string.  The result is nicely spread out and surprisingly “webby”.  On Friday, we made spiders out of pipe cleaners to adorn our creation.  I’m interested in seeing if the spiders will become a popular plaything next week.