Flooding the Nile

When we first started our investigation of Ancient Egypt, many of the students wanted to know where people got their food and how they lived back then.  As a means to answer this question, we began reading a book that explained that the Nile river provided the Egyptian people with fertile soil each summer when it would overflow onto the banks. The people would plant seeds including wheat, barley, beans, and peas. Then they would let nature do the rest.

20130313_8354

To demonstrate this, we created our own river bed out of some potting soil, foil, rocks, and lots of water! We then planted some grass seed on the river banks and proceeded to flood the river. The water spilled over the edges of the river, effectively watering the seeds. Now we wait. Hopefully by the time we return from spring break, we will begin to see some noticeable changes in our river banks.

20130313_8369

What did you do in Pre-K?

This has been a very busy week.  It always seems, as we draw closer to the end of the year, that the number and variety of projects we still wish to accomplish becomes insurmountable.  Maybe you’ll let me keep them all for another year? Yes? Hmmm…I guess not.  In that case, I’ll just fill you in on what’s been happening this week.

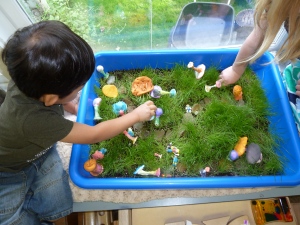
Our play garden has finally developed enough to add the mushrooms and some small friends for playing.  My plan to use the path for a game board has been a bit challenged by the grass growth, though.  On Monday, the children used scissors to help me give it a trim and I’ve been trying to keep up with weeding between the rocks, but it is still jungle-esque.
Our basil plants have grown much in the last few weeks.  I think I will send them home with the children on Monday.  Care and feeding should be quite easy.  Simply fill the bottom of the 2-liter bottle half-way with water and set the upturned top inside the bottom.  This step makes it self-watering.  Place it in a sunny spot indoors or out and you’ll have yummy basil all summer.

Another activity that involves up-cycled materials used most of the water bottle caps we’ve been collecting all year.  At first, I had planned for us to make some sort of outdoor musical instrument or chime.  The sound of the many caps clinking together is rather pleasant.  However, as I began on a test version, I realized how much a string of them resembled a caterpillar.  What luck since we’re preparing for our annual Very Hungry Caterpillar play.

Each child took turns using a hammer and a short, sharp nail to pre-poke holes into all of the lids.  We practiced one at a time during a Morning Meeting so that I could be sure that each child understood the procedures and safety issues that needed to be in place.  We also placed the cap on a clipboard prior to hammering so that we wouldn’t damage the tables.
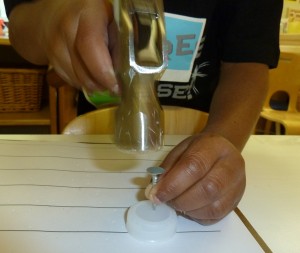
For many of the children, this was the first time they had been allowed to use a hammer.  I was very impressed with the earnestness with which they approached the task.  Not once all week was there a wild or dangerous moment.  They took this job quite seriously.

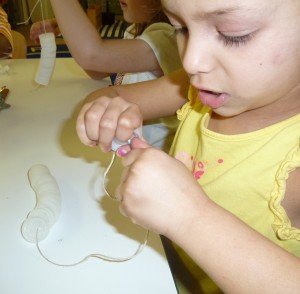
The next step was new for many as well.  They had to thread a large, plastic needle with twine and “sew” twenty of the caps together.  All of the children have had many experiences with beads, but the change in mode of string delivery caused a bit of confusion.  At least two students muddled through poking the twine through the holes of a couple of caps without the needle only to find that the needle was still attached near the knot at the end.  Once we figured out how to hold the needle and both ends of string together in a pincer grasp, it became much easier.  It was also a great opportunity for me to informally assess their ability to consistently count objects to twenty.
The rest of the week involved a plethora of preparation for our play  [isn’t that a mouthful].  I think I’ll just allow you to wonder what those projects might have been, though.  We’ll see all of you next Friday at 10:45 for our play and you can see for yourself.  Remember, if it is a dry day, we will be performing outside on the playground on the stage.  If it is raining, you can safely assume that we’ll be in the multipurpose room.  Our family picnic will follow directly with the location to be set by the weather.  So far, families have signed up to bring fruit, juice, and cookies.  If anyone wants to add pretzels or other crunchy treat or any other dishes, please let me know.  I ordered the sandwich rings this morning, so I’m salivating already.

Garden Work

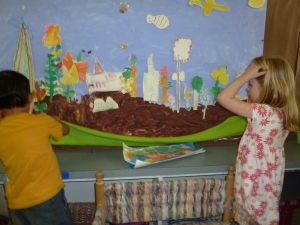
Looking at our garden mural last week, the children realized we were still missing some important elements that we had included on our plan.  We were in need of both grass and clouds.  Two groups chose to focus on each of these problems.  They were told that they could use any of our art materials for the task, but they had to create their own design.

The cloud group chose to use paper from the “fancy scrap paper” basket and a container of cotton balls.  Two of the group chose to make 3D clouds by cutting and folding paper into a shape that pleased them.  They then used tape to secure the shape.  I was impressed that their first attempt did not include a flat, two-dimensional version.  The third member of the cloud team re-created a sky on a new piece of paper and then carefully glued on cotton balls in three straight lines.

The grass team chose a completely different material for their project.  While digging through our supplies, they came across an old, green, flannel scarf.  They decided that it would be perfect for grass.  After carrying it over to the mural, they realized that it was too long.  Without any prompting from me, one of the students yelled, “We need to measure it!”  I asked the group how they could measure the scarf and the mural.  Another child remembered that one of our dramatic play area baskets held a toy measuring tape.  Two children stretched out the tape while one looked at the numbers.  Working together, they decided on an appropriate place to cut the scarf.  Then, they had to figure out how to attach their grass to the mural.  Their first suggestion was staples, but I nixed that idea since I”m hoping that we’ll be able to move our mural for the Very Hungry Caterpillar play on May 20th.  Eventually, they decided that tape was the best solution.  Around 40 pieces of tape later, we had some very lovely grass on our mural.

Grass Stylists and Play Gardens

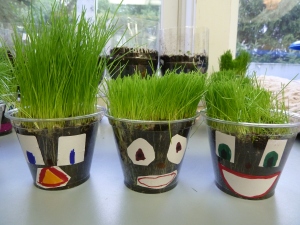
We finally had the opportunity to cut our “friends'” grassy locks yesterday. Thank goodness, as you can see it was getting a little wild!

Our Friends' Long Hair

First, we had to discuss how short we could cut it without damaging the grass.  The children noticed that the grass had two colors, light green near the soil and darker green on top.  The decision was made to leave at least a tiny bit of dark green so the grass would remain healthy.  Next, each child had to decide how they wanted to shape the grass.  Did they want it to have a mohawk? a crew-cut? just a trim?  We had many variations.  It was interesting to watch as they laboriously cut the grass with scissors.

Children who generally spend huge amounts of time on writing and drawing projects also took their time carefully snipping grass a blade at a time.  Children that  usually plan less when working with paper were more apt to chop, chop, chop away until there was very little left to cut.  Either way, it was a fun way to explain plant growth, the purpose of green plants in our world, and the parts of plants.

A Before and Two Afters

Moving on in the day, we were just as excited to see that our play garden had begun to sprout grass, as well.

I have many plans for this tub-o-soil and I can’t wait for the grass to fill in so that the children can begin using it as a miniature play space.  One of the projects we began yesterday will provide us with some lovely, tiny toys to use with this new garden.  Following along with this class’s love for fairies and magic, we’ve designed a set of mushrooms for the garden.  These were created using model magic and inspiration from a large group of images.

The children observed that there were many, many shapes and sizes of mushrooms.  They thought the red, flat ones looked like “jumping” mushrooms and the pitted ones reminded them of cheese.  While trying to figure out how to form one out of dough, they realized that almost all of the pictures showed mushrooms with long  rectangles or stems .  I explained that this shape was called a cylinder and could be found all over their world including within their own arms and legs.

Forming cylinders was easy of course since all of our students have mastered worm making.  The next obstacle we faced was keeping the stems upright long enough for the model magic to dry.  After fussing with countless droopy mushrooms and not a few frustrated exclamations [the children kept reminding me that it was “no biggie”], I remembered that I had a handy supply of tooth picks nearby.  A bit of poking and prodding produced a lovely collection of fungi for our play garden.  The children are itching to paint them tomorrow.

This lesson, of course, included a public safety announcement as well.  After a long discussion involving a tale of my childhood and random yard mushrooms, we agreed that absolutely no mushrooms must be eaten unless they come from the store.  So if your child balks at eating the next mushroom you produce on their plate, simply confirm its safe passage through the mushroom farm, to your local grocer, and into your soup.

Sprouts and Haircuts

Since planting our grass and basil seeds last week, we’ve seen much change in our room.  The grass friends have grown enormously long hair.  Today we took a poll to see who might want to give their grass a trim and who would like to let it grow.  Surprisingly, most of the children wanted to let it grow.  I did have one child tell me very somberly, “We are not allowed to cut our friends’ hair!”  She felt a bit better when I explained that I meant the grass, not real hair.  I’m wondering if we’ll have more “cutters” once they see the three who voted to trim going at their grass with scissors.  One person did have a bit of an epiphany during morning meeting when he realized that it would grow back after the trim.

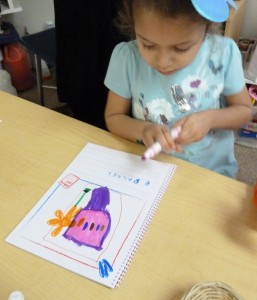
While we’ve been watching the grass shoot up this week, we’ve been logging our observations in our journals. The children are using a combination of “kid writing” and known words to write about the pictures that they draw.  They have noticed roots growing, soft grass, wet dirt, and two colors on the grass.  In this picture, R. is writing about how she sprays the grass with water to help it grow.

I am watering my plant.

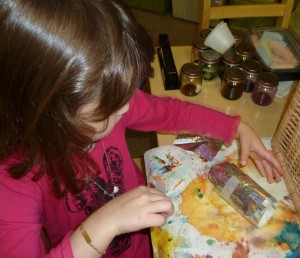
Our other plants have not be growing so profusely, but they are steadily changing from a simple pile of dirt.  We created bottle planters for our basil plants so that they would stay watered with minimal help.  Since their growth is so slow, these new plants have not quite caused the stir that the grass did, but some of the children are excited about the possibility of eating these new leaves.  Hopefully, we’ll have at least one large plant per bottle eventually so you can share these at home.

The Bottle Planters
Observing our bottle planters.

We also began a project at the beginning of the week that I hope turns out as I’ve planned.  We began a large classroom garden in a tub with grass seed and a path.  The path was constructed using flat rocks the children collected outside.  They have suggested that it would be a perfect walkway for ants.  Let’s hope we don’t have any of those in our room roaming around!  We’ll just have to wait and see how the grass seed does in this container.  It is generally kept away from the window, so keep your fingers crossed!

Creating a path in our garden.